How to Navigate Without Buttons on Android
A cracked power button or a mushy volume rocker can make a perfectly good phone feel unusable. The good news is that Android has quietly built in enough on-screen tools that you can navigate without buttons for almost everything you do in a normal day.
Quick answer: You can navigate Android without hardware buttons by turning on gesture navigation (Settings > System > Gestures) for Home, Back, and Recents, then enabling the Accessibility Menu (Settings > Accessibility > Accessibility Menu) for power, volume, and lock-screen actions. Together these built-in tools cover almost every task a physical button normally handles. The only exception is booting into recovery or bootloader mode from a fully powered-off phone, which still needs the physical button combo.
What you'll learn
- Why power and volume buttons fail so often, and why a repair isn't always worth rushing into
- How to turn on gesture navigation to replace Home, Back, and Recents
- How to use Android's free Accessibility Menu for power, volume, and screenshots
- When a floating shortcut overlay like Assistive Touch adds extra convenience
- Which single button-only action Android still can't fully replace
Why hardware buttons fail and what Android offers instead
Power and volume buttons are small mechanical switches, and mechanical switches wear out. Dust, drops, and thousands of repeated presses over a couple of years are enough to make a button stick, double-click, or stop responding altogether. It's one of the most common hardware complaints on any phone, regardless of brand.
Getting a power button professionally repaired costs real money, and the price swings a lot depending on the phone model and whether you go to an authorized service center or a third-party shop. That's money worth saving on something that, in many cases, doesn't need fixing right away.
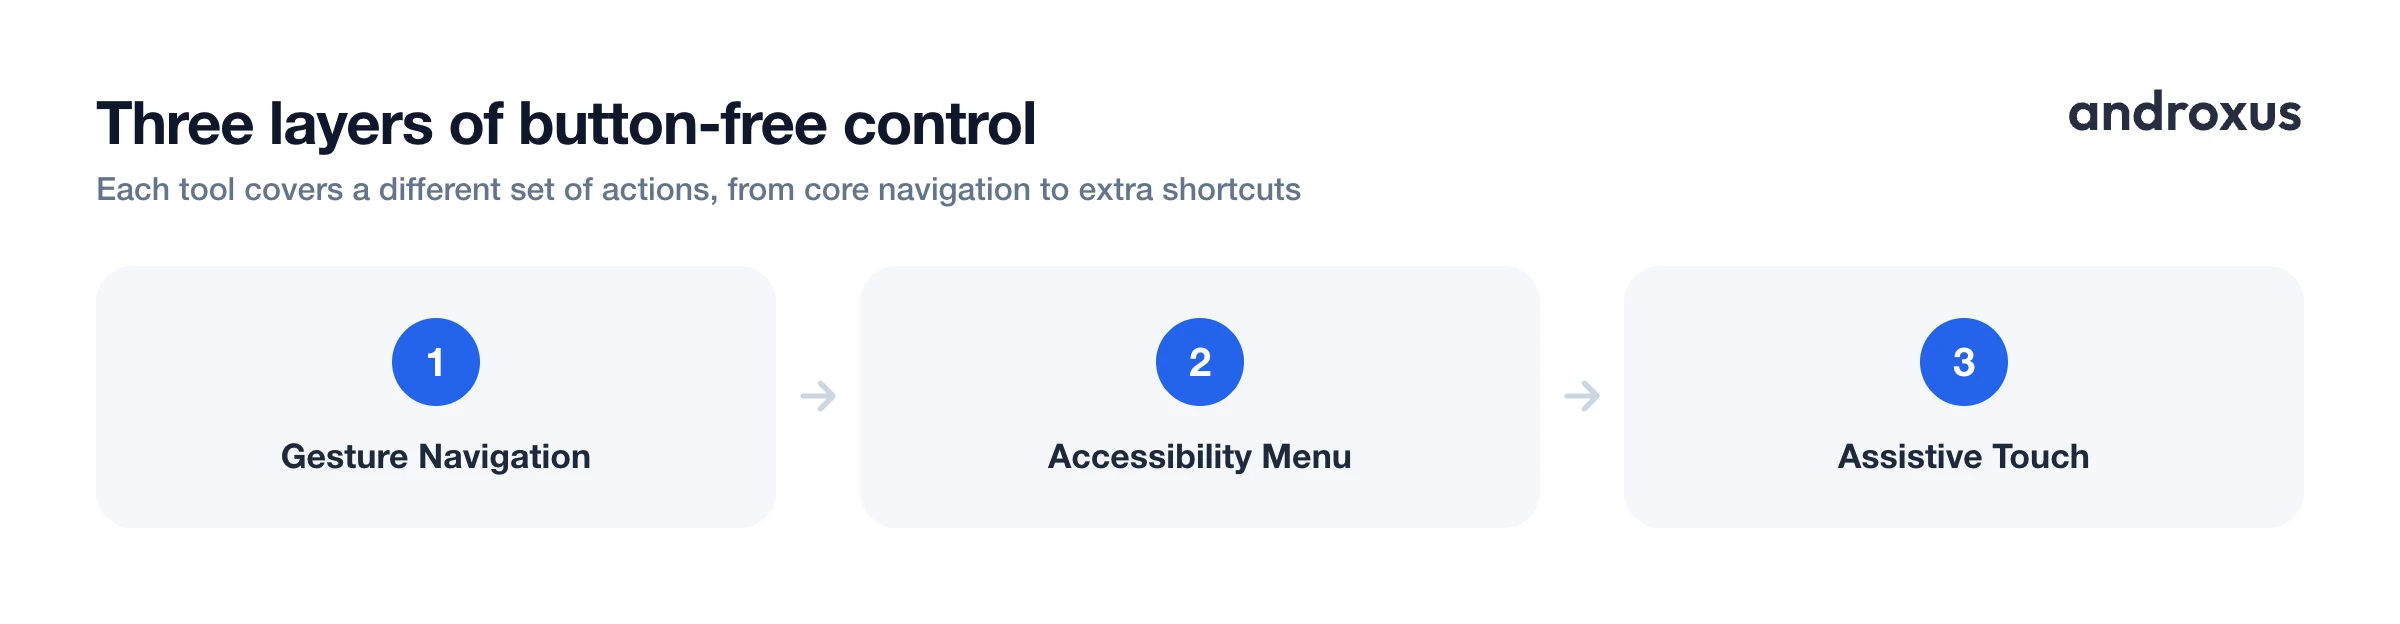
Android has offered on-screen alternatives to hardware buttons for years now. Full gesture navigation became standard with Android 10, and the Accessibility Menu, a free tool built by Google, has been available even longer. So a broken button doesn't have to mean a broken phone, and some people turn these tools on proactively just to reduce wear on a button they know is already weak.
Turn on gesture navigation to remove Home, Back, and Recents buttons
Gesture navigation replaces the on-screen (or physical) Home, Back, and Recents row with swipe gestures across the whole bottom of the screen.
To enable it, go to Settings > System > Gestures > System navigation and choose Gesture navigation. The wording and exact location shift a bit by brand:
- Samsung: Settings > Display > Navigation bar
- OxygenOS (OnePlus): Settings > Buttons & gestures > Navigation bar
- MIUI/HyperOS (Xiaomi): Settings > Additional settings > Navigation bar
Once it's on, the gestures work like this:
- Swipe up from the bottom edge: Home
- Swipe up and hold: Recent apps
- Swipe in from the left or right edge: Back
Samsung also offers a 2-button mode that pairs a Back button with a combined Home/Recents pill, which some people find easier for one-handed use. If swipes trigger Back too easily, or don't register at all near the edges, the same settings screen usually has a slider to adjust left and right edge sensitivity.
Use the Accessibility Menu for power, volume, and lock-screen actions
This is the tool that actually replaces your physical power and volume buttons, and it's free and built into Android. Turn it on at Settings > Accessibility > Accessibility Menu, then enable the shortcut. A floating icon appears on screen once it's active.
Tapping the icon opens a panel with virtual controls for:
- Power (lock, restart, power off)
- Volume up and down
- Brightness
- Lock screen
- Recent apps
- Notifications and Quick Settings
- Screenshot
- Google Assistant
You can open the menu either by tapping the floating icon or with a two-finger swipe up from the bottom of the screen (three fingers if TalkBack is also turned on). The icon can be dragged to whichever corner is most reachable, and there's a "Large buttons" option if smaller targets are hard to tap accurately.
Because this is a native Google accessibility feature rather than a third-party app, it works the same basic way across most Android phones running a reasonably current version of Android.
Add a floating shortcut overlay for everyday one-handed navigation
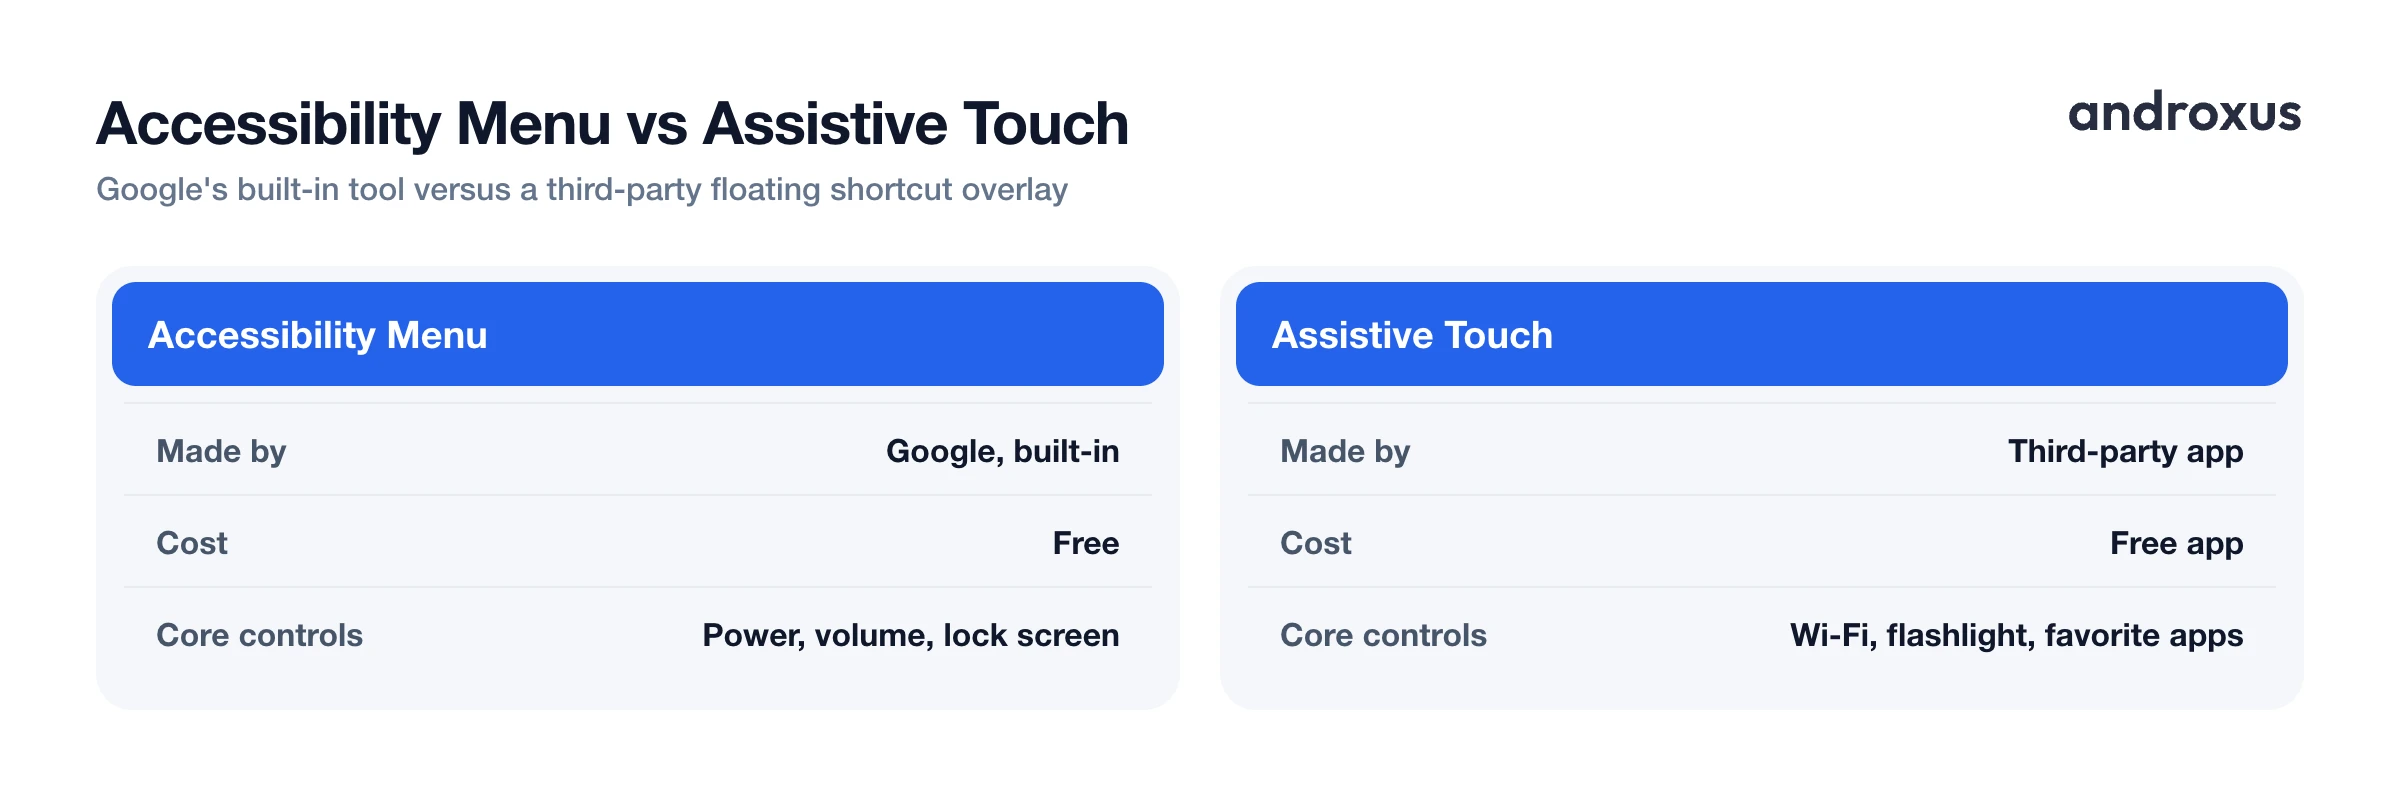
The Accessibility Menu covers the essentials, but if you want more shortcuts available at a glance, without digging through a panel each time, a floating shortcut app is worth adding. Assistive Touch, for example, places a small customizable dot on top of any screen with shortcuts for soft Home and Back, Recents, scrolling to the top or bottom of a page, notification and Quick Settings access, screen rotation, the power menu, screenshots, screen recording, flashlight, screen off, favorite-app launchers, calculator, speed dial, QR scanning, and toggles for Wi-Fi, Bluetooth, brightness, and ringer mode. The dot's size and position on screen are both adjustable, so it can sit wherever your thumb naturally rests.
Under the hood, this kind of overlay relies on Android's Accessibility Service, the same underlying system API the Accessibility Menu uses, to draw the floating button and carry out whatever action you tap. It's worth being clear about scope here: a floating shortcut overlay like this triggers actions on demand. It does not read keystrokes, passwords, messages, or any other personal data, and it's best thought of as a convenience layer for navigation, not a way to access anything you couldn't already reach normally on the phone.
Screenshots, restarts, and other button-only actions
A few specific tasks are worth calling out because they normally depend on a button combo.
Taking a screenshot without buttons: open Quick Settings and tap the Screenshot tile (add it through the edit or pencil icon if it isn't there already), say "take a screenshot" to Google Assistant, or use the Screenshot option in the Accessibility Menu. Some phones also support a gesture shortcut: Samsung has a palm swipe to capture under Settings > Advanced features > Motions and gestures, and MIUI supports a three-finger swipe down under Settings > Additional settings > Gesture shortcuts.
Restarting or powering off: many phones show a power icon in the full Quick Settings panel when you swipe down twice, though this isn't universal across every brand and Android skin. Where it's missing, the Accessibility Menu's Power option is the more reliable fallback.
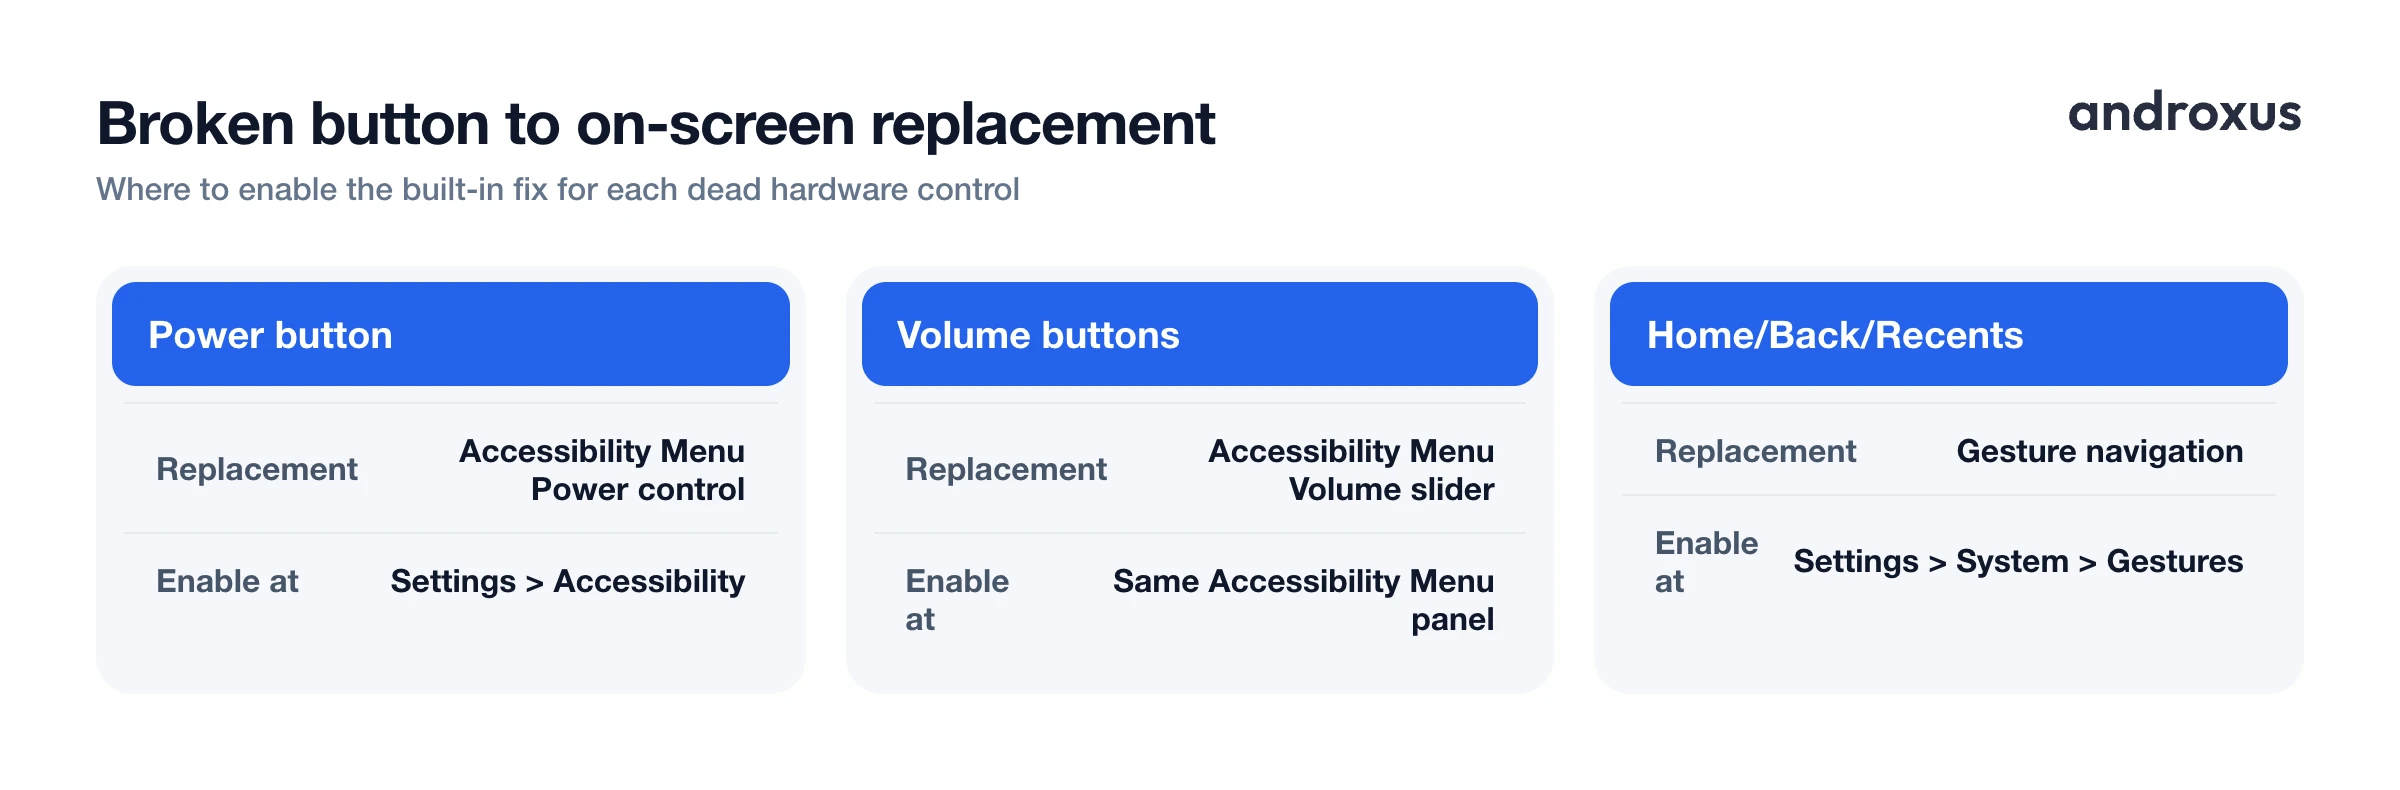
Here's a quick reference for matching a broken button to its on-screen replacement:
| Broken hardware | On-screen replacement | Where to enable it |
|---|---|---|
| Power button | Accessibility Menu Power control, or an assistive-touch power-menu shortcut | Settings > Accessibility > Accessibility Menu |
| Volume buttons | Accessibility Menu Volume slider | Same Accessibility Menu panel |
| Home/Back/Recents | Gesture navigation | Settings > System > Gestures > System navigation |
| Screenshot combo (power + volume) | Quick Settings Screenshot tile, Google Assistant voice command, or an assistive-touch screenshot shortcut | Quick Settings edit panel, or the Accessibility Menu |
The one honest limitation worth knowing about upfront: booting into recovery mode or the bootloader from a fully powered-off phone still requires the physical power and volume-button combination on most Android devices. On-screen tools only help once the phone is already on and unlocked, so if your buttons are fully dead, avoid letting the phone power all the way off if you can.
How to navigate Android without hardware buttons
- Switch to gesture navigation. Go to Settings > System > Gestures > System navigation and select Gesture navigation. Swipe up from the bottom for Home, swipe up and hold for Recents, and swipe in from either edge for Back.
- Turn on the Accessibility Menu. Go to Settings > Accessibility > Accessibility Menu and enable the shortcut. This gives you a floating panel with virtual Power, Volume, Screenshot, Lock screen, Brightness, and Notifications controls.
- Position the floating icon for easy reach. Drag the Accessibility Menu icon, or your gesture edge zones, to whichever corner is easiest to reach one-handed.
- Add a Quick Settings screenshot tile. Swipe down twice, tap the edit icon, and drag the Screenshot tile into your active tiles for a one-tap screenshot method.
- Add a floating assistive-touch button for broader shortcuts. For quick access to recent apps, flashlight, favorite-app launchers, or toggles like Wi-Fi and Bluetooth, an app like Assistive Touch adds a customizable floating dot you can size and position however you like.
- Test your power-menu replacement before you need it. Confirm you can reach restart, power off, and emergency call through the Accessibility Menu or your assistive-touch overlay, so you're prepared if a button stops responding later.
Key takeaways
- Gesture navigation (Settings > System > Gestures) removes the need for physical or on-screen Home, Back, and Recents buttons.
- The Accessibility Menu (Settings > Accessibility > Accessibility Menu) is a free, built-in Google tool that covers power, volume, screenshots, and lock screen.
- A floating shortcut overlay like Assistive Touch adds extra convenience for scrolling, favorite apps, and quick toggles, using Android's Accessibility Service without reading any personal data.
- Quick Settings and Google Assistant both offer button-free ways to take a screenshot.
- Booting into recovery or bootloader mode from a fully powered-off phone still needs the physical button combo, so it's the one gap these tools can't close.
Frequently asked questions
Can I use an Android phone completely without any hardware buttons?
For everyday use, yes. Gesture navigation replaces Home, Back, and Recents, and the Accessibility Menu or a floating assistive-touch overlay covers power, volume, screenshots, and lock screen. The one exception is booting into recovery or bootloader mode from a fully powered-off phone, which still requires the physical power and volume combo on most devices.
Where do I turn on gesture navigation?
Go to Settings > System > Gestures > System navigation and choose Gesture navigation. On Samsung it's Settings > Display > Navigation bar, on OxygenOS it's Settings > Buttons & gestures > Navigation bar, and on MIUI/HyperOS it's Settings > Additional settings > Navigation bar.
What is the built-in Android tool for a broken power button?
The Accessibility Menu, found at Settings > Accessibility > Accessibility Menu. It is made by Google, free, and adds a floating panel with virtual power, volume, screenshot, and lock-screen controls, so you don't need a repair or a third-party app just to restart or lock your phone.
Does turning on accessibility services slow down my phone or drain the battery?
Accessibility overlays like the Accessibility Menu or a floating assistive-touch dot are lightweight and run in the background much like a keyboard app. They don't run heavy processing, so the impact on battery and performance is minimal for most users.
Does a floating shortcut app like Assistive Touch read my messages or passwords?
No. Assistive Touch is a floating shortcut overlay that triggers actions like Back, Home, screenshot, or opening an app. It uses Android's Accessibility Service to draw the overlay and perform those actions, but it does not read keystrokes, passwords, messages, or other personal data.
How do I take a screenshot if both my power and volume buttons are broken?
Open Quick Settings (swipe down twice from the top) and tap the Screenshot tile if you have one, or add it by editing your Quick Settings tiles. You can also say 'take a screenshot' to Google Assistant, use the Screenshot option in the Accessibility Menu, or use a floating assistive-touch button's screenshot shortcut.
